 Automation is when things operate with little or no human interaction. If you are a desktop musician, automation will be your good friend. Do you want a fade out at the end of your song? A guitar track to pan left, then right at specific points in your song? Maybe you want the distortion to gradually work it's way into your guitar track or the EQ to change on the same track, without using a new track for just a few seconds of effect. Now lets say you want ALL of these things in the same song. Let's automate. Most programs now have the line-dot way of doing things also called "Node editing." Basically, a line runs underneath the length of your track. That line represents two things
- An effect of your choice (volume, pan, distortion...)
- The adjustment for that effect (loudness, you hear sound from the left or right, more distortion - less distortion...)
By default the line is set at "+0db
" for volume, "center" for pan
FADE IN and FADE OUT.
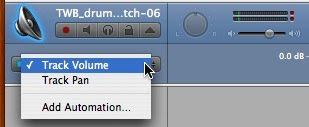
1. Select the automation arrow on the track you want to edit. It is the arrow that is next to the Lock icon on your track. It will reveal a node editing track below the audio file in the track.

Now you will see a drop down menu that will allow you to select Volume or Pan or Effect. Volume is selected by default.

2. You will notice a line that runs horizontally. On this line you will place nodes (dots) by single clicking at an IN point where you want no volume. Now select and OUT point where you want your song to be at full volume.
3. Simple "click-hold" the first node and drag it down as far as it will go. Your line will now look like it has a ramp. This represents your volume increasing or FADE IN.
4. Select an IN point where you want your of your clip or song to get quieter and an OUT point to where you want no volume. "Click-hold" and drag your OUT point down as far as it will go. Now your volume will decrease.
This screen grab shows the volume fading in (line going up), holding at 0db then fading out (line going down).

PAN
1. From the drop down menu at the side of your automation track select "PAN".

By default your audio is set to Center. This is represented by a line running along the middle of your automation track.
2. Click the point where you want to start a pan and another where you want that pan to end. The click-hold to drag your node up (LEFT) or down (RIGHT)

You can have a track panning and fading in at the same time. Even if you add automation to your additional effects like distortion, EQ etc... they will all operate simultaneously, if you want them to. My friend recently told me how in the past it might take a few guys at a mixing console to operate each effect by turning individual knobs as the song was playing. Now you just need a mouse that clicks.
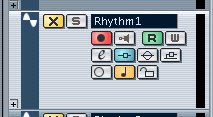
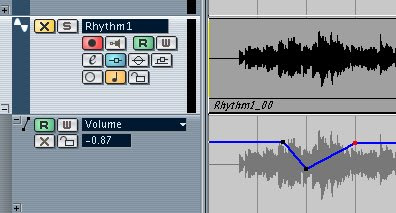
In Cubase SX1 you will need to reveal the automation track by clicking the "+" sign at the bottom left of your track.

Then select your "draw" tool

Now you can add / drag nodes to your track.

This blog originates from nathanfleet.blogspot.com
No comments:
Post a Comment